• The forum software that supports hummy.tv has been upgraded to XenForo 2.3!

    Please bear with us as we continue to tweak things, and feel free to post any questions, issues or suggestions in the upgrade thread.

Start Up Fails When HDD Connected

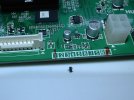
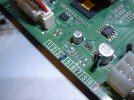
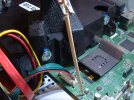
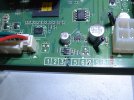
Confidence was high that the 2N4401 was dud – but started to wane when its junctions were checked out of circuit with a DMM and nothing abnormal was found. Sure enough, after transplanting the one from the working PVR it didn’t fix the fault.

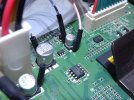
Attention has returned to the nearby electrolytic over which I placed a 1” long Hellermann sleeve. Fresh from the oven, squirting freezer down into the sleeve provoked the fault. I’ve now attached some monitor wires across this cap so that I can ‘scope the voltage across it and try adding another cap in parallel. Watch this space.

[Edited 18 Nov 2021 to add following and fifth attachment.]

Incidentally, U551 (nearby) is a 64K serial 2-wire EEPROM. EEPROMs have been known to become problematic over time, but not in this case I think.
 

Attachments

  • 2N4401 removed from good PVR.JPG
    2N4401 removed from good PVR.JPG
    324.9 KB · Views: 47
  • Suspect 2N4401 removed from faulty PVR.JPG
    Suspect 2N4401 removed from faulty PVR.JPG
    332 KB · Views: 41
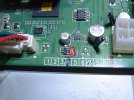
  • Locating transplanted 2N4401 in faulty PVR.JPG
    Locating transplanted 2N4401 in faulty PVR.JPG
    332.7 KB · Views: 40
  • Transplanted 2N4401 soldered in place.JPG
    Transplanted 2N4401 soldered in place.JPG
    322.9 KB · Views: 45
  • Monitor wires added to suspect cap.JPG
    Monitor wires added to suspect cap.JPG
    322.4 KB · Views: 47
Last edited:
I’ve now attached some monitor wires across this cap so that I can ‘scope the voltage across it and try adding another cap in parallel.
Is it not easier just to remove it and measure it?
Be interested in knowing what soldering kit you're using etc. (And optical aids!)
 
Is it not easier just to remove it and measure it?
Be interested in knowing what soldering kit you're using etc. (And optical aids!)
Thanks for your comments.

This is our in-service PVR (had to be returned in time for the missus to watch last night's Grand Designs over lunch) so I'm taking a "minimally-invasive" approach to minimise risk of damage to the board/domestic grief; it's easier to tack-on a couple of wires than remove the cap (which may have to be put back if it's not that). Also, it would be nice to understand the problem, so watching the volts across the cap as the PVR struggles to boot may be informative.

Optical aids are two pairs of glasses (2.75D + 3.5D, I think) - and plenty of light. Soldering kit is a basic 25W Antex (with temperature adjustment), so nothing fancy, plus good ol' desoldering braid and white spirit as flux remover (using cotton buds and toothpicks).
 
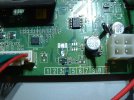
From personal experience, with power supply PCBs etc, the capacitor I have ringed in red is also suspect as I have had many of this type go either open or leaky.
 

Attachments

  • Transplanted 2N4401 capacitor ringed.JPG
    Transplanted 2N4401 capacitor ringed.JPG
    692 KB · Views: 69
From personal experience, with power supply PCBs etc, the capacitor I have ringed in red is also suspect as I have had many of this type go either open or leaky.
Thanks - yes, a possible candidate. Aussie Dave Jones's long-running EEVblog (highly recommended) covered failure of these components a few years ago - #1037: youtube.com/watch?v=QgKY5QWehME

An interesting update on the problem to follow lunchtime today following some overnight tests...
 
I attached the monitor wires to the suspect cap late yesterday morning and the PVR was returned to the lounge. As expected there were numerous boot attempts when switching on for lunch, and again late afternoon after having removed it to take the pic of the attached wires and replace the lid. The PVR was put into standby around 22:30 (overnight lounge temperature about 18 degrees C).

Around 03:00 today I set up the USB ‘scope* (in chart recorder mode) to monitor the voltage across the cap** over the several minutes it would take to boot up after applying power – except it booted straight away! I tried standby off/on several times (waiting for the HDD to run-down each time) and each time the PVR booted ok – even with ‘scope disconnected. After leaving it in standby for 90 minutes to cool down (not that it had had much chance to warm up) and with the ‘scope disconnected (the wire bare ends were taped to the worktop) it again booted first time.

I then soldered a 1u/50V cap across the wires and returned the PVR to the lounge. It booted ok at 06:00, was put into standby around 07:30 and on turning on for lunch today at 12:40, again booted first time. More thinking and testing required – but maybe it’s time to get that cap out, as prpr suggested.

*Input is 1M//16p (I haven’t been using a x10 probe thus far) and set to DC coupling.
**I don’t think the cap –ve is at system ground - but no problem connecting the ‘scope ground (which is likely connected to mains ground through its PSU) here as the PVR system ground is not connected to mains ground (no other connections while under test). More on this potential trap for young-players here: youtube.com/watch?v=xaELqAo4kkQ (How NOT To Blow Up Your Oscilloscope!)

[Edited 19 Nov 2021 to add following.]

Booted ok again late afternoon. Anyone fancy reverse-engineering this part of the circuit? A quick inspection suggests it might be monitoring - or is otherwise connected with - the HDD's 12V supply (rather than its 5V supply). I will endeavour to do so in due course - unless someone beats me to it. Another result this week was that the for-spares/repair HDR-Fox T2 I obtained for £24 delivered (included 20% eBay Black Friday discount) seems to work fine, including its HDMI output - the declared fault was that this was duff ("green screen"). Incidentally, electronic freezer spray seems currently to be unobtainable/silly prices.
 
Last edited:
I've always wondered why 'scopes don't have balanced differential inputs. Surely it can't be that hard to do in circuit terms compared to the unbalanced one side is ground type stuff you always see. It would make things so much easier and it's been done for decades with pro audio.
 
I've always wondered why 'scopes don't have balanced differential inputs.
I think the issue would be common mode voltage. Without an actual ground connection, the common mode could float to anything and needs limiting somehow... so you might as well have a ground, and if you've got a ground you don't need differential.

it's been done for decades with pro audio
Sure, but (preferably) with a ground reference as well, or at least something to control the common mode voltage (centre tap on a signal transformer) or isolate the common mode voltage (transformer coupling). Transformers are OK at audio frequencies, not so good at close to DC.
 
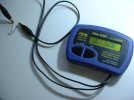
Full details later but, of necessity, I've had to remove U24 (and the cap, while I was at it). On the plus side this has allowed me to reverse-engineer what turns out to be the HDD 12V switch circuit (where the problem is) and conduct out-of-circuit checks on the cap with the ESR70. The fault that keeps on giving - but at least I'm getting stuck into the weeds of this problem now.
 

Attachments

  • Cap + U24 removed.JPG
    Cap + U24 removed.JPG
    324.5 KB · Views: 40
On the plus side this has allowed me to reverse-engineer what turns out to be the HDD 12V switch circuit (where the problem is)
My reasons for thinking so are lost in the mists of time, but in Post 1 I mused that the 12V supply is unswitched. Maybe the 12V is established much earlier in the start-up than the 5V to the HDD. My limited circuit tracing shows there is a switch circuit in the HDD 12V (Post 28).

However, given this (from your Post 76):

1637398853479.png

...I think I should make it an urgency to take another look at my particular patient, and confirm what the 12V supply is doing.
 
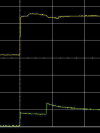
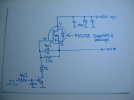
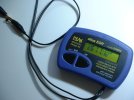
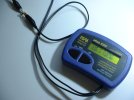
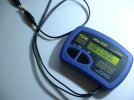
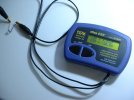
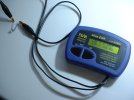
HDD 12V switch schematic attached showing U24, now believed to be an FDC658 P-channel Mosfet (not as previously stated in post #80). Also attached, test results on a from-the-spares-drawer 4u7/50V cap for reference showing effects of freezing and recovery therefrom. Removed cap test results to follow.

It transpired yesterday evening that U24 had died – no idea why as neither scoping across the cap nor adding the 1u/50V should have killed it. Maybe static? Out-of-circuit it measures 300R D-S and S-D, so a replacement needed to restore HDD functionality.
 

Attachments

  • HDD 12V switch schematic.JPG
    HDD 12V switch schematic.JPG
    322.6 KB · Views: 54
  • At room temp.JPG
    At room temp.JPG
    326.4 KB · Views: 49
  • Frozen.JPG
    Frozen.JPG
    321 KB · Views: 30
  • Warming 1.JPG
    Warming 1.JPG
    325.7 KB · Views: 28
  • Warming 2.JPG
    Warming 2.JPG
    324.6 KB · Views: 26
  • Warming 3.JPG
    Warming 3.JPG
    325.4 KB · Views: 28
  • Warming 4.JPG
    Warming 4.JPG
    328.9 KB · Views: 47
might you have overheated it?
Don't think so - my pic in post #81 shows that I soldered the wires directly on the cap, some distance from U24, so it shouldn't have heated appreciably. Not sure when U24 died - the HDD was running-up ok early yesterday, after I'd attached the wires and 'scoped the voltage across the cap (that's when the PVR unexpectedly booted first time). I had my ear to the HDD assy listening for the little click you get even if the HDD doesn't run-up - and the whine shortly after when it does.
 
The HDD can't be expected to draw much current at 12V, can it? The MOSFET is said to to show ~1Ω S-D when fully on, as it should be with its S-G voltage ~10V after the enable signal turns the NPN transistor on. Is the unswitched 12V actually rather higher? And how strange that the designers lost out on the opportunity of yet another LDO regulator. Also that warming up appears to restore the 4μ7F cap from short circuit.
 
The HDD can't be expected to draw much current at 12V, can it?
I was planning to cannibalise the HDD power cable and the board-mounted plug from the eBay PVR which arrived this week so that I could monitor the current (voltage across a low-value series resistor) on the 5V and 12V supplies during HDD run-up - but (a) events have overtaken that scheme; (b) the PVR seems to be fully working (the cover seal is intact), so too good to cannibalise.
 
Having successfully installed the not-faulty 2N4401 (removed from the faulty PVR – see post #81) in the good PVR we’ll be running on this until the replacement Mosfet has arrived and been fitted to the faulty PVR (which should restore HDD functionality); as I’ll put in a new 4u7 cap at the same time, I’m hoping the PVR will then no longer be faulty.

In the meantime, maybe it’s worth doing the YouTube mod to make the display (more) visible – anyone tried this? “I didn’t even know it had a display”, to quote the missus.

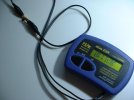
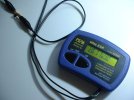
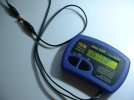
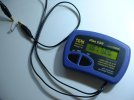
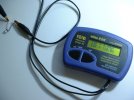
Attached are the results of the tests on the cap I removed; it seems to have a very high ESR (and low capacitance) at room temperature and does some crazy things when cold (compare with the earlier test results). Case solved?
 

Attachments

  • At room temp (removed cap).JPG
    At room temp (removed cap).JPG
    324.3 KB · Views: 15
  • Frozen (removed cap).JPG
    Frozen (removed cap).JPG
    327.9 KB · Views: 15
  • Warming 1 (removed cap).JPG
    Warming 1 (removed cap).JPG
    326.1 KB · Views: 15
  • Warming 2 (removed cap).JPG
    Warming 2 (removed cap).JPG
    325.9 KB · Views: 14
  • Warming 3 (removed cap).JPG
    Warming 3 (removed cap).JPG
    331.2 KB · Views: 15
I’m hoping the PVR will then no longer be faulty.
I appreciate you have had no choice but to replace the 2N4401, the 4u7 and U42, but I think you will be missing an opportunity to isolate the faulty component if you don't put the suspect 4u7, (on a say two stubby wires), together with the other two components, that way you can very quickly swap new and old 4u7s to prove that it is the faulty component
 
I appreciate you have had no choice but to replace the 2N4401, the 4u7 and U42, but I think you will be missing an opportunity to isolate the faulty component if you don't put the suspect 4u7, (on a say two stubby wires), together with the other two components, that way you can very quickly swap new and old 4u7s to prove that it is the faulty component
You have a point - but the ESR60 (not ...70 as I thought - that's a later version) results are conclusive, I'd say. I may do this - but look where, perhaps, trying to be too clever got me when I attached wires across the cap in-situ rather than simply removing it: one dead Mosfet. Also, there's a limit to how much work the board will take before tracks start to lift (if you look closely you'll see that the cap +ve land has started to lift already). I think these SMD blighters have a little dot of glue on their underside which makes them more difficult to remove than might appear. With the cap and U24 removed I measured 0.6V across the 2N4401's B-E when turned on, and 1.1V at the top end of its 1k collector resistor (1/11 of 12V) so the 2N4401 is ok; the Mosfet will be new stock (I'll check it on arrival) but I guess I could damage it in handling/fitting. And I think I'll use a conventional electrolytic rather than an SMD type.

[Edited 20 Nov 2021 to change to U24.]
 
I may do this - but look where, perhaps, trying to be too clever got me
Yes, I've done this too. A server motherboard with a one blown-up network port - in trying to prove categorically that the cable between the switch and the PC was at fault, having almost proved it anyway, went and blew the other port in the same manner as had happened to the first (no, I don't know how it can happen either, but it did). Then had to bodge an external adapter to give it its network back. Much swearing.
 
Back
Top