Start Up Fails When HDD Connected

We explained at the time it was not a good idea to replace a 4.7uf electrolytic capacitor that is 25v on this machine. The original is rated at 35V 4.7uf and a smd Capacitor. You agreed for us to put our part on. You should not change a smd capacitor for a through hole version. You should replace like for like. You can put a higher voltage on it but not lower. Capacitance should be the same, not lower or within 10% higher...
As a general rule yes, but not when you know the circuit parameters. 35V is unnecessary in this case, even 25V is overkill.

SMD: nice if you can get one, but if you can't you have to make do with what you can get – ie a radial leaded. It is also difficult to fit SMD components without specialist tools.

Nobody here suggested you take it to a repair shop – if you had mentioned it I would have told you not to waste your time and money (or theirs). It would either be very expensive, or bodged as a favour. Replacing with a second-hand HDR-FOX is the most viable option, and replacing the capacitor is last-ditch for when there is nothing to lose. Without further detailed testing there was no certainty that replacing the capacitor would cure the problem (it might not even have been the same problem).

It is not correct there were no schematics, there are sketches of the circuit topology in this area up-thread. But nonetheless, I'm quite sure the repair shop offered you no guarantees, and made their best effort based on the limited information you provided. They would not want to be spending time reading lengthy forum posts, nor engaging with the discussion. We could have advised, but it's unreasonable to expect.

Basically they're saying they did what you asked them to do and washing their hands of it, and I don't blame them one iota. You were being naïve by complaining, and particularly naïve griping in this thread when you know they've seen it.

We are enthusiasts, you are a consumer. Enthusiasts go to lengths inappropriate for a consumer, even inconvenience. As a consumer, a PVR is an off-the-shelf item: you buy one, you use it until it breaks, becomes obsolete, or you decide to get another one.

 
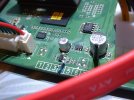
The said one of the solder pads came off so they had to use a wire.
Looking at the pictures you have provided the green wire has not been prepared, fitted or soldered very well. I would be embarrassed if I had charged a fee for that workmanship !
 
Looking at the pictures you have provided the green wire has not been prepared, fitted or soldered very well. I would be embarrassed if I had charged a fee for that workmanship !
Precisely my thought on seeing that picture. I'd be embarrassed if that were my work and I'm strictly a hobbyist. And it would be normal to fit solid core wire for a repair like that, not multi strand as they have done with attendant risk of a strand coming loose and shorting to something else.
 
Replacing the Mosfet (U24) and the 4u7 cap in the HDD 12V switching circuit has fixed our faulty PVR; it is an ex-faulty PVR. The conclusion, then, is that the likely culprit for any problem embraced by this thread’s title (or something similar, especially if temperature-related) is that 4u7/35V SMD cap. I replaced it with a 4u7/25V conventional electrolytic (there’s never more than 12V across it, so the derating is ok). Remember, I blew-up the Mosfet (still don’t see how) - it wasn't responsible for the original fault.

The details of how the PVR detects a problem with a slow-starting HDD 12V and forces a restart (and why, at other times, such as for scheduled recordings from standby, it’s not bothered) remain a mystery. As does why it boots ok with the HDD disconnected.

I joined this thread at post #67 and we’re now at #122. Sorry about that – but I thought present and future readers would benefit from a blow-by-blow account of fixing this fault.

Removing the HDD supplies' test wires and replacing the SPDIF socket will complete the job for me.
Just fixed my PVR that was constantly rebooting and wanted to thank you for the advice. Just wish I had seen this before dumping my last machine that had the same problem.
 
Just fixed my PVR that was constantly rebooting and wanted to thank you for the advice. Just wish I had seen this before dumping my last machine that had the same problem.
Glad you fixed the problem. I like working on these machines as they are very serviceable in terms of dismantling, ease of access, etc. I'm currently reacquainting myself with ours since I'm trying to recover its hard drive which it is now saying needs formatting (though it doesn't) - the subject of another thread. Having a couple of spare units is a big help in trouble-shooting.
 
Hi all. I have no electronic knowledge so much of this is way over my head. But my t2 has the same symptoms, ie won’t boot with the hd connected, but will once it is disconnected. Hd works fine once plugged in after boot. Can someone tell me which capacitor needs replacing, specifically where it is on the board and how to go about it? Any chance 8 will be able to do it without any specialist equipment? Many thanks
 
Hi all. I have no electronic knowledge so much of this is way over my head. But my t2 has the same symptoms, ie won’t boot with the hd connected, but will once it is disconnected. Hd works fine once plugged in after boot. Can someone tell me which capacitor needs replacing, specifically where it is on the board and how to go about it? Any chance 8 will be able to do it without any specialist equipment? Many thanks
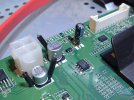
The suspect cap is in the centre of the attached pic, marked 4,7 35V - any 4u7 (4.7 microfarad) electrolytic capacitor rated 16V or more will do the job - it doesn't have to be SMD (surface mount device) like the original. You need a soldering iron (25W, ideally) and basic skills to remove the suspect and install a new one. It's vital to apply plenty of heat to both sides of the original cap so that it can be cleanly removed without damaging the printed track. Hope that helps.
 

Attachments

  • PVR 1 getting close....JPG
    PVR 1 getting close....JPG
    256.7 KB · Views: 4
You know I've never understood what you mean by the boot loop. There's no loop on a screen so what loop do you mean?
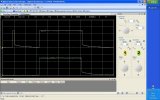
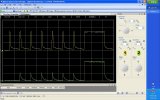
The attached pics may help. The first shows a good PVR being taken out of standby (ie turned on) and the HDD supplies establishing ok. The second was what was happening when mine went faulty showing it making several attempts to establish the supplies (mine eventually got there). In both pics I put into standby (ie turned off) after the supplies had established; the supplies then shut off a short while later. The onset of cold weather heralded the fault - cooking the PVR in an oven at 30C and use of freezer spray were key to tracking down the fault.
 

Attachments

  • 01 Good PVR, HDD 12V+5V, 60s sweep, sby off 5s, sby on 30s.jpg
    01 Good PVR, HDD 12V+5V, 60s sweep, sby off 5s, sby on 30s.jpg
    133.4 KB · Views: 4
  • 04 Faulty PVR, HDD 12V+5V, xxs sweep, bad startup.jpg
    04 Faulty PVR, HDD 12V+5V, xxs sweep, bad startup.jpg
    146.8 KB · Views: 4
Boot begins normally. If you observe the normal boot process, it is a short time before the HDD spins up. With this particular fault, the moment the process tries to start the HDD (ie turns on power to the HDD), something detects a fault and applies a hard reset, restarting the boot. No other form of "not booting" matches this fault, which is why I am cautious when somebody says "it's not booting".

We have become aware of a common fault developing on ageing HDR-FOXes where the unit won't boot with the HDD connected but will boot without it. While this might seem to indicate a faulty HDD, in some instances it has been shown to be a deeper problem on the main board (not the PSU). The main diagnostic symptom is that the boot process continually restarts the moment "start system" (or the custom firmware announcement, if installed) disappears from the VFD (front-panel display), which is when the HDD gets powered up (but before it has had chance to be accessed).

I realise you admit to not reading everything, which is why you then have to ask for explanations.
 
The suspect cap is in the centre of the attached pic, marked 4,7 35V - any 4u7 (4.7 microfarad) electrolytic capacitor rated 16V or more will do the job - it doesn't have to be SMD (surface mount device) like the original. You need a soldering iron (25W, ideally) and basic skills to remove the suspect and install a new one. It's vital to apply plenty of heat to both sides of the original cap so that it can be cleanly removed without damaging the printed track. Hope that helps.
Many thanks. Really helpful. 👍
 
Back
Top